
First, download Audacity (it’s free):
1. Website: Go to https://www.audacityteam.org/download/
2. Select your operating system: Windows or Mac
3. Download: Download the install file for your operating system
4. Install: Follow the steps to install onto your computer
5. Open: When completed, open the program. You should see something like this:
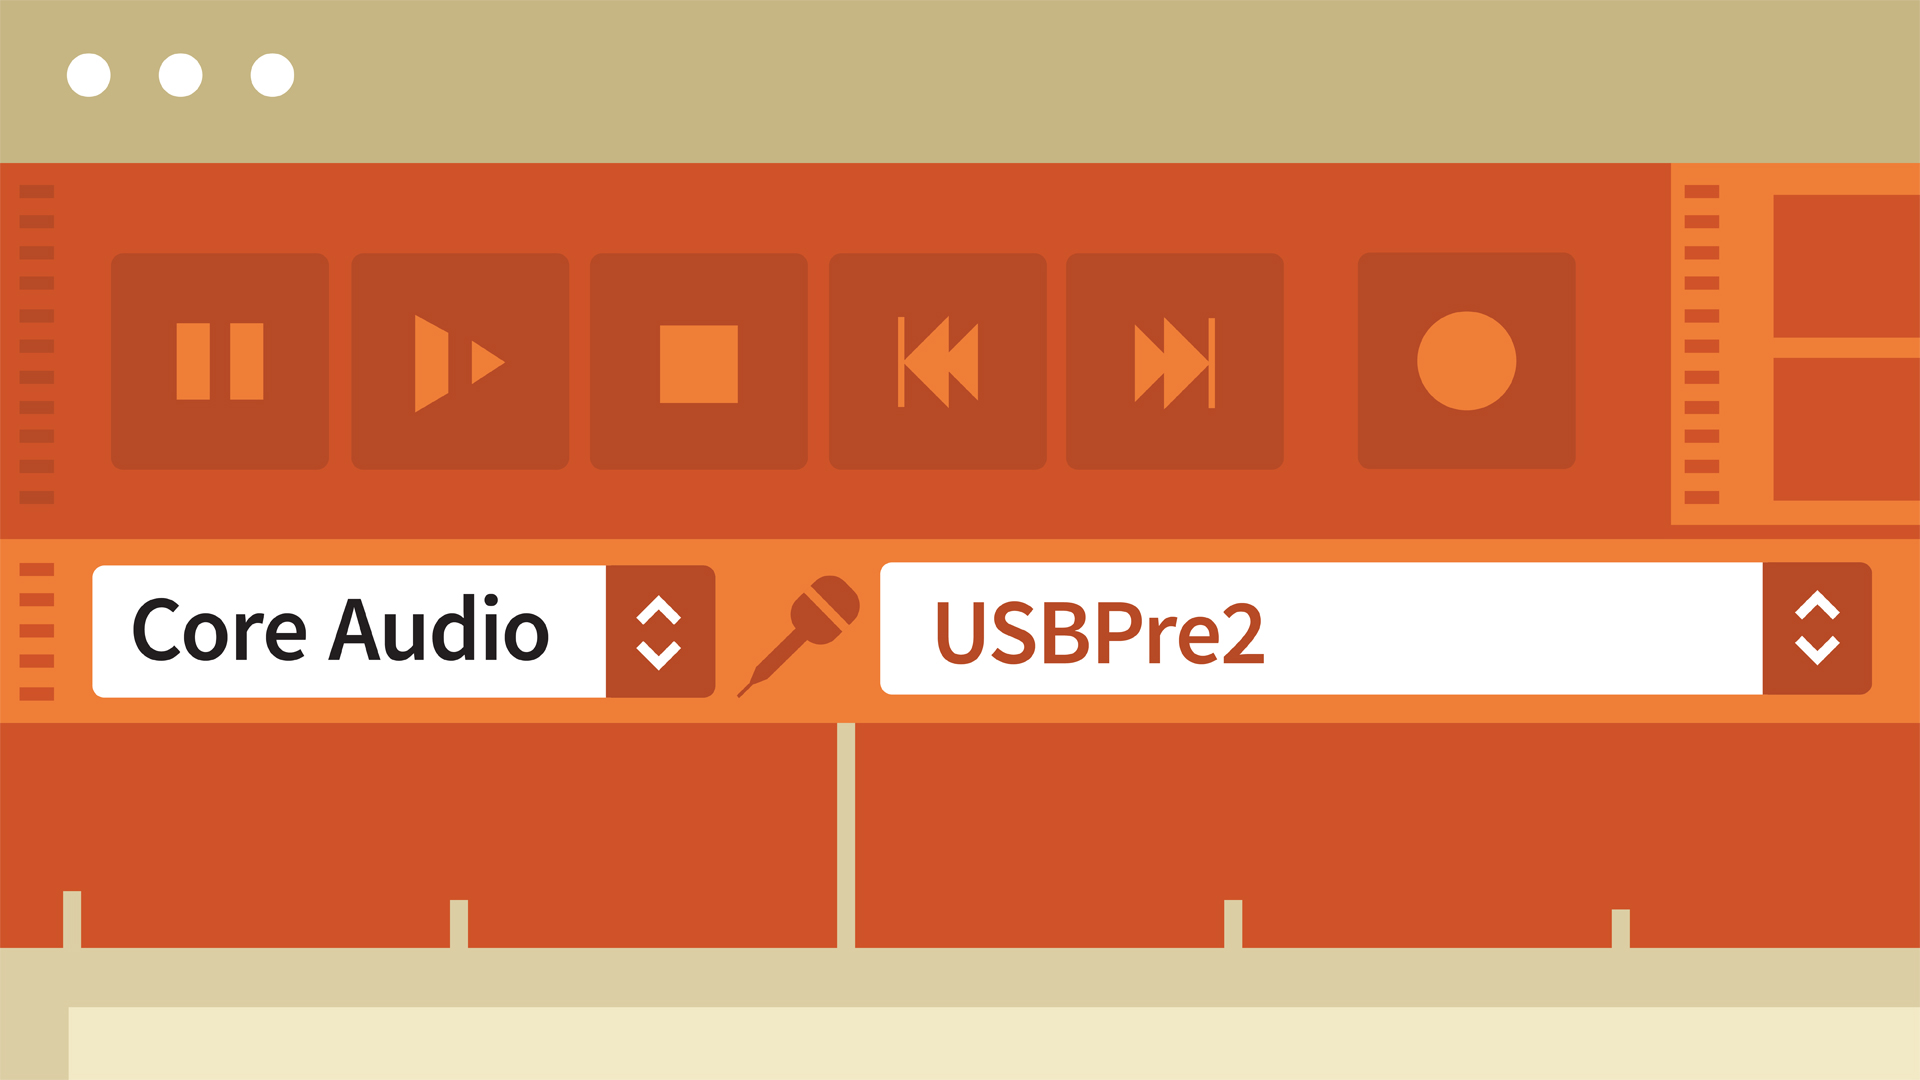
Setup For Your Interview
6. Find the Icon: Don’t be overwhelmed! Next to the microphone icon, you should see this:
![]()
The first and third dropdown menus is for your Microphone (input) and Sound (output)
7. Set Up Your IO: Now, we need to select your input and output:
a. If you’re using your computer’s built-in microphone and speakers, it should automatically default to these. You don’t have to change anything.
b. If you’re using another microphone that needs to be plugged in, select it from the first dropdown menu (e.g. Blue Yeti Microphone).
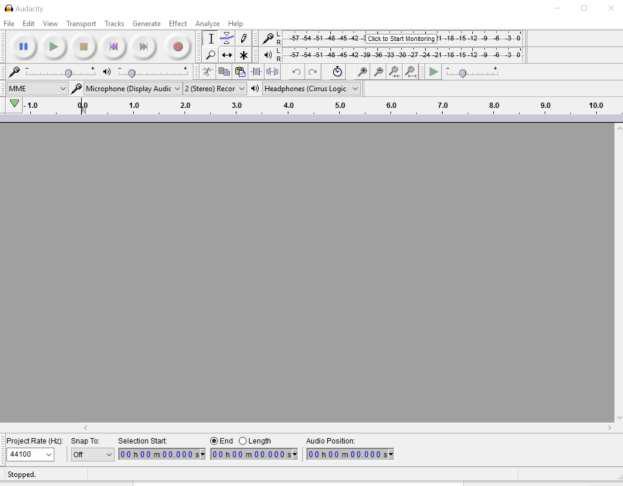
8. Test Record: You’re almost done. Hit the red RECORD button and let it run for a few seconds. It should look similar to this:
9. Test the Levels: After letting it run for a few seconds, press the Yellow STOP button and check:
a. No Sound: If the blue line in the middle is completely straight and the green bars at the top didn’t move, that means there’s no sound. Make sure you select the right microphone (see step 7).
b. Background Noise: If the blue line in the middle is very jagged and the green bars at the top is at 30 or lower, that means there’s a lot of background noise. You should try moving to a spot with less noise (if you can).
10. Delete: If you’re happy with the noise levels of your microphone, delete the recording by pressing the X next to “Audio Track.”
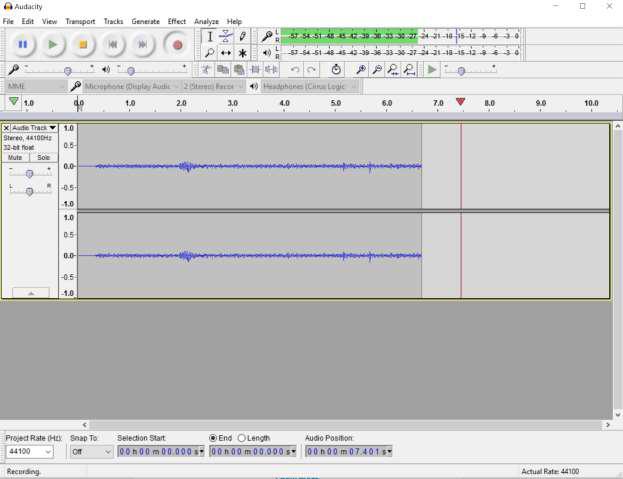
11. Test Your Voice: After completing the noise levels test (step 9), now let’s try testing your voice.
Keep an eye on the green bars as you test your voice and speak clearly into your microphone for a few seconds.
As you speak, try and turn the green bars to yellow on a consistent basis (around the -6 mark and trying to stay above -12 as best as you can).
![]()
If you hit RED consistently, that means you’re too loud. Try moving away, talking softer, or turning down your microphone.
If you stay GREEN consistently, that means you’re too soft. Try getting closer, talking louder, or turning up your microphone
12. Delete: If you’re happy with the noise levels of your, delete the recording by pressing the X next to “Audio Track” (same as step 10).
Record and Export Your Interview
1. Moment of Truth: You’re ready to record! Here are a few things to note before recording:
a. Be sure to avoid hitting the computer or table the computer is on otherwise it’ll make a loud pop sound.
b. Be sure to avoid any fidgeting (like pen clicking, etc.) while you’re talking.
c. Talk at the microphone as best as you can. Looking around, leaning back, etc. will make the sound levels inconsistent.
2. Interview: When you’re about to start, press the RED Record button and let it run!
3. Export the File: When you’re done recording, export the .WAV file by going to:
a. File > Export Audio
b. Name the file: MMDDYY_YourFullName_BusinessName
That’s it! Your episode has been recorded. Now you can edit it or publish is directly to your favorite podcast hosting platform.